If you own a shed located on acreage and find it tedious to manage extension cords from your residence, it is crucial to ensure that your shed is properly wired. Whether you need a basic storage shed requiring only lighting and a power point, or a fully equipped workshop that utilises equipment like welders and compressors, adhering to the right procedures is vital for safety and functionality. In NSW, the only legal way to achieve this is by hiring a licensed electrician.
This comprehensive guide outlines the necessary steps to supply electricity to your shed, detailing what your electrician will require for the installation process and providing an estimate of the costs related to the Mid North Coast.

Maximise Your Shed’s Power Supply: A Complete Guide to Cable Runs
The foremost consideration for any shed wiring project involves ensuring effective power transmission from your main switchboard to the shed itself. On larger properties, this distance may extend to 30, 50, or even over 100 metres. The longer the distance, the larger the diameter of the cable required to manage voltage drop effectively.
When planning cable runs, you have two primary options available:
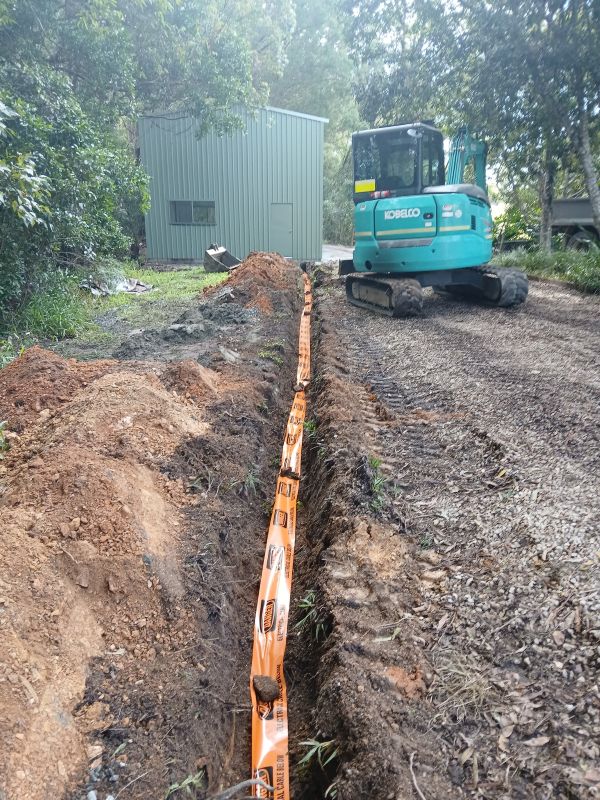
- Underground cable run — This is the most common and visually appealing option. Your electrician will install a durable cable through orange conduit buried at least 500mm deep, or deeper in areas where heavy vehicles regularly pass. This method protects the cable from adverse weather conditions, wildlife interference, and falling branches, making it the preferred choice for most properties with significant acreage.
- Overhead cable run — Although less common, this option may be necessary if solid rock is present or if the terrain complicates trenching. Overhead runs must meet proper clearance heights and necessitate support poles, which can significantly elevate costs.
For the majority of properties in or around Bellingen, Coffs Harbour, and the Mid North Coast, an underground cable run is the most recommended approach. Your electrician in Bellingen can evaluate your site and suggest the optimal installation route.
Establishing a Reliable Power Supply for Your Shed: The Importance of a Dedicated Sub-Board
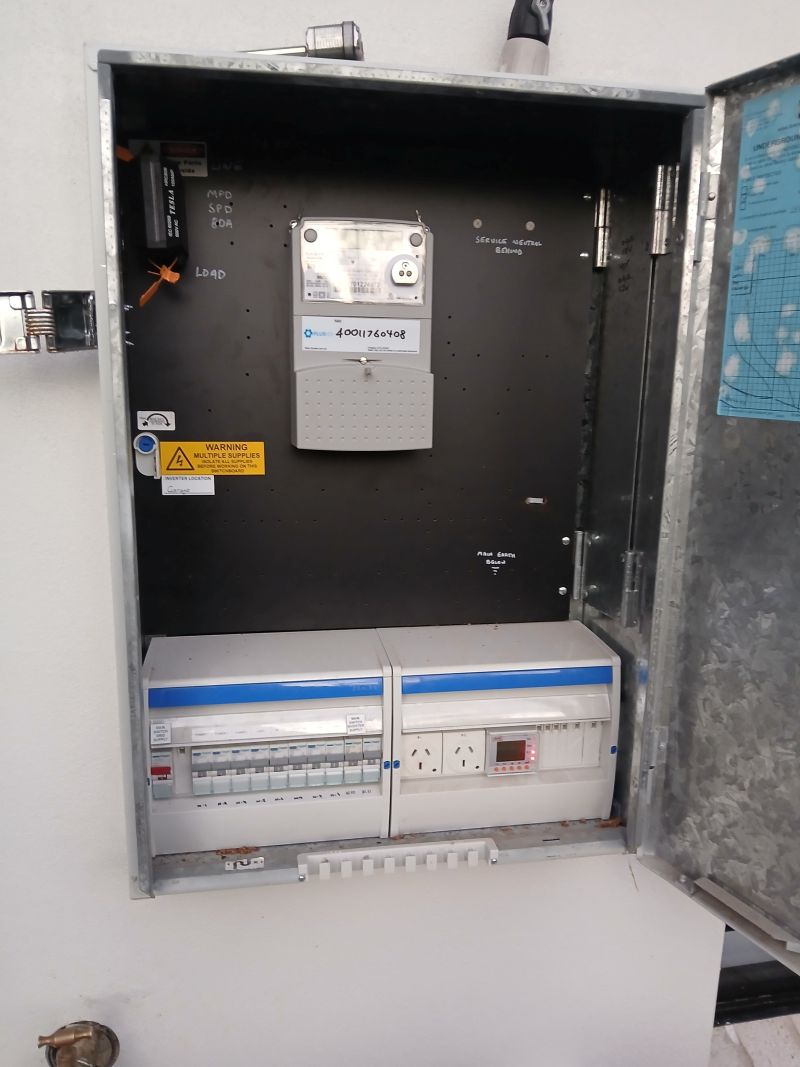
Merely running a single cable to the shed and connecting appliances does not suffice. Any shed equipped with a proper power supply must include a dedicated sub-board, often referred to as a distribution board. This crucial device functions as a mini switchboard within the shed, effectively managing all circuits to ensure safety and efficiency.
Your sub-board will typically include the following essential components:
- Main switch — This component allows you to isolate all power to the shed independently from the main house, enhancing safety and control over the electrical supply.
- RCDs (Residual Current Devices) — These devices, mandated by NSW electrical regulations, provide rapid power cut-off in mere milliseconds in the event of a fault. This feature is crucial for safety in a shed environment where moisture, dust, and damaged leads are common hazards.
- Circuit breakers — These devices offer individual protection for each circuit within the shed, covering lighting, general power, and dedicated tool circuits, ensuring reliable operation.
If your house’s switchboard is outdated, your electrician may also recommend upgrading it to accommodate the additional load directed to the shed effectively.
What Are the Key Features to Install Inside Your Shed for Maximum Functionality?
The specific installations that your electrician will carry out inside the shed will depend entirely on its intended use. Here’s an overview of typical setups for various applications to guide your decision-making process.
Creating a Functional Basic Storage Shed
If your shed primarily functions as a storage area for tools, a ride-on mower, or other equipment, consider implementing the following setup:
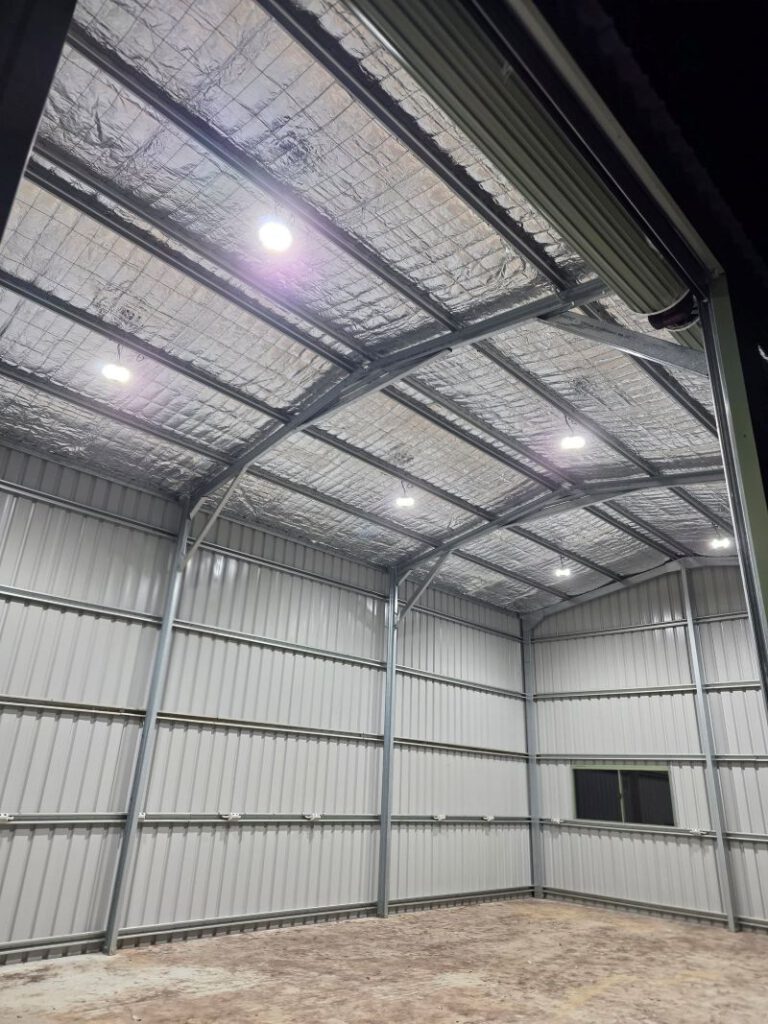
- LED batten lights — One or two ceiling-mounted LED batten lights will effectively illuminate the entire area. Your electrician can provide recommendations on the best lighting arrangement based on the shed’s dimensions and layout, ensuring safe and efficient use.
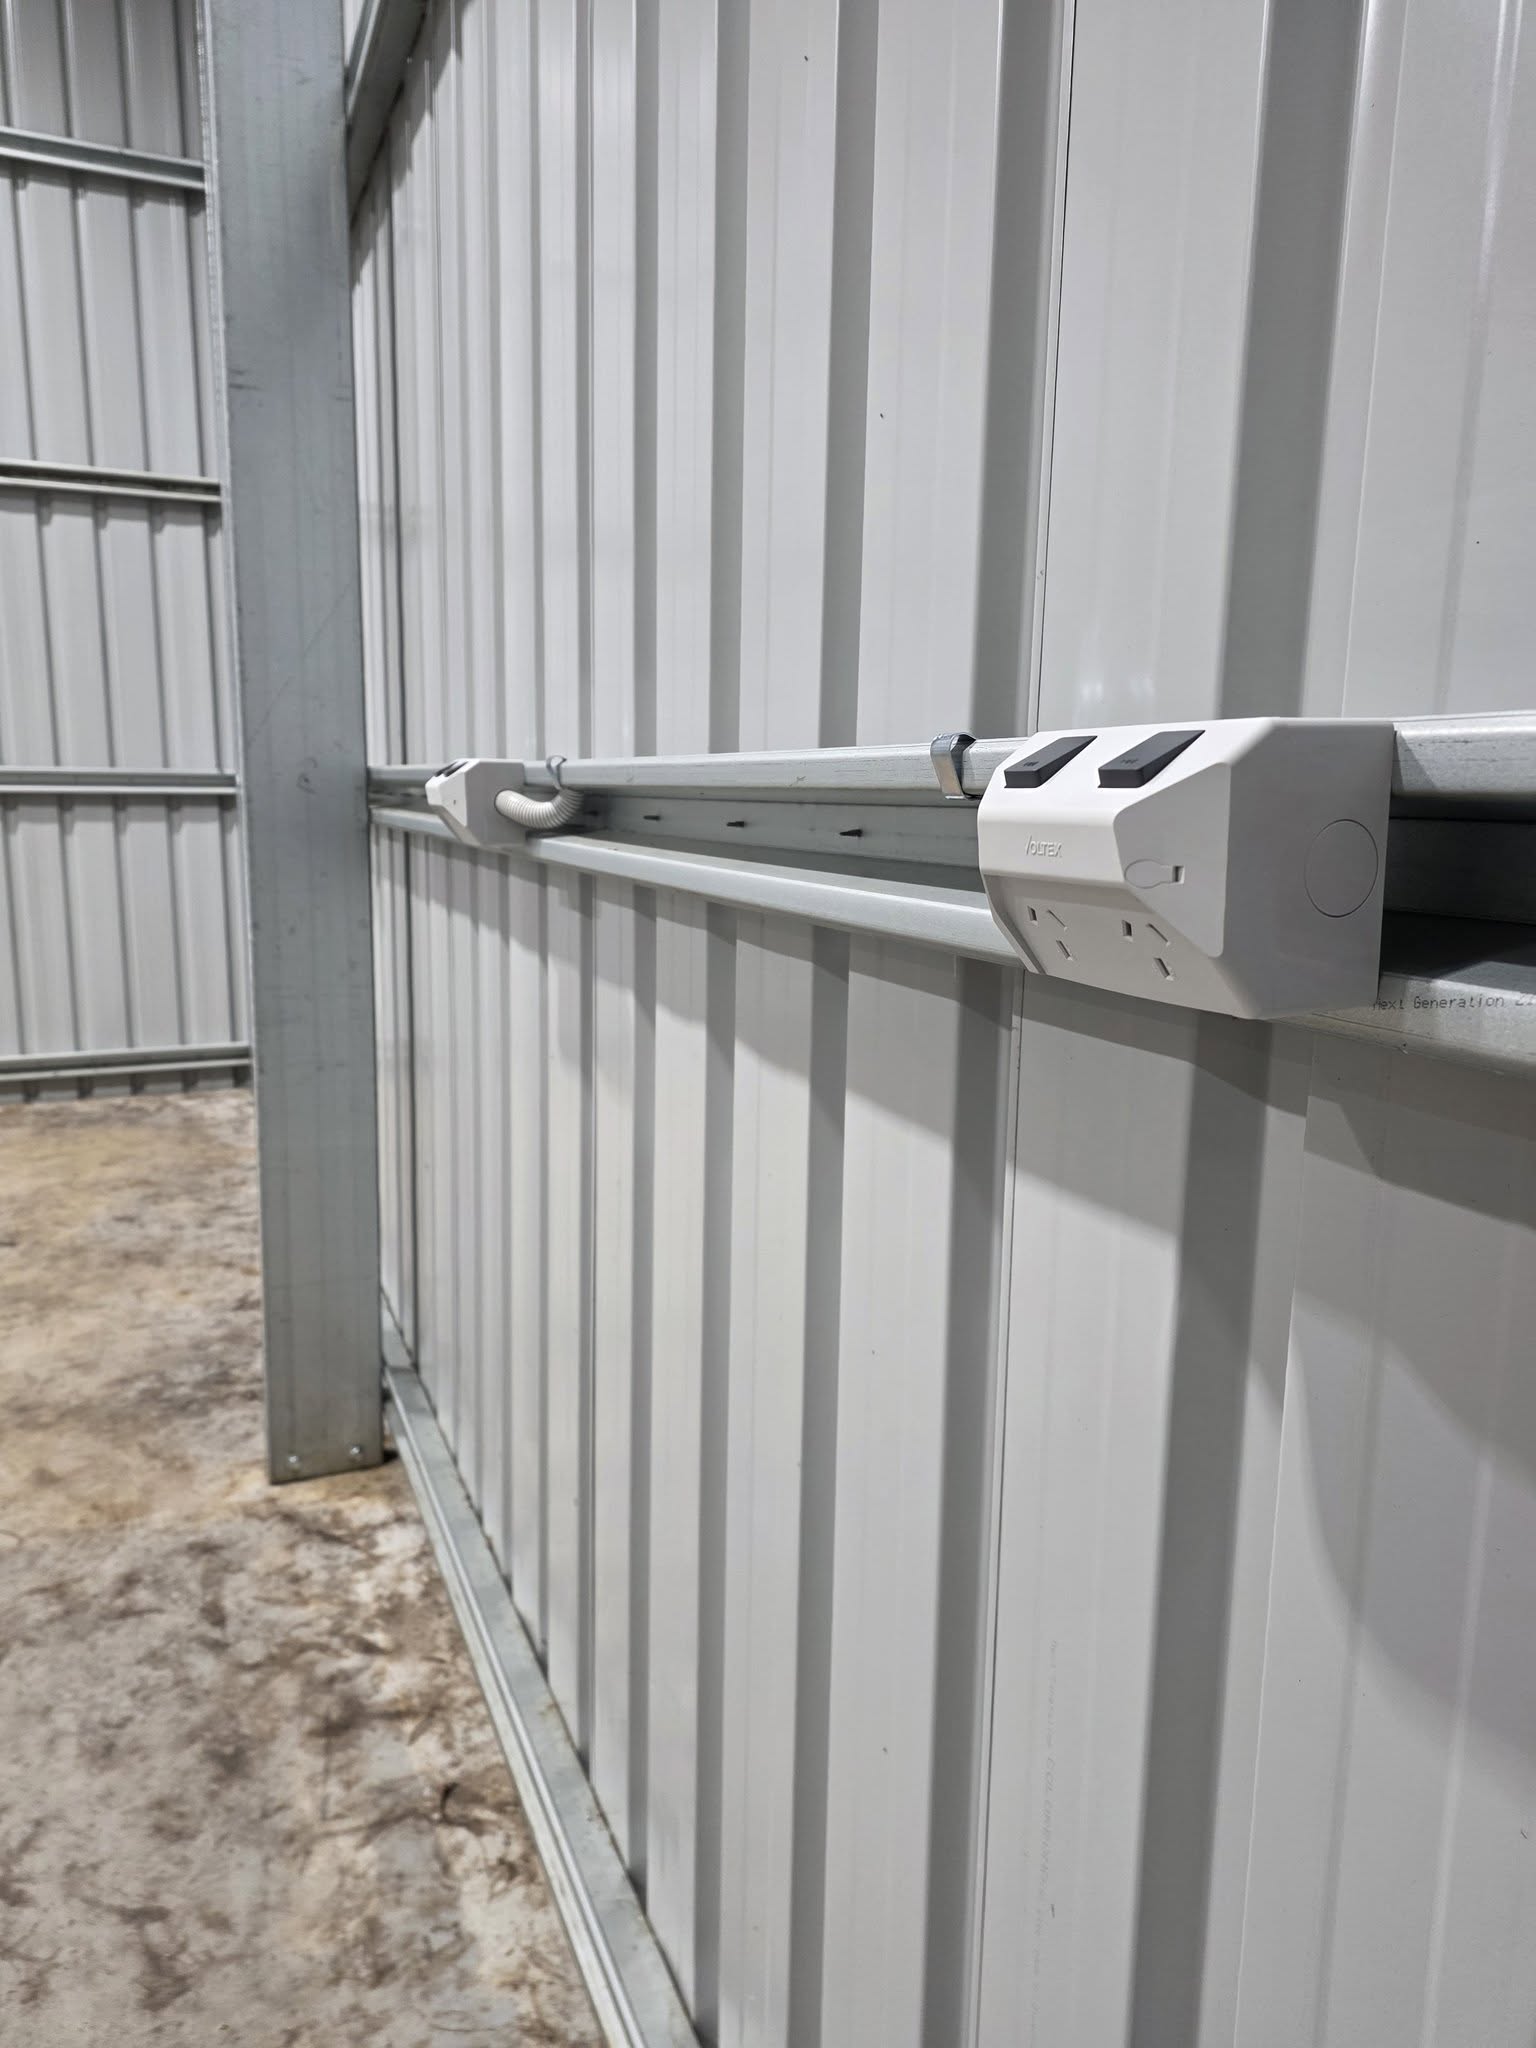
- Two to four general power points — These will be sufficient for plugging in a charger, a radio, or a drop saw when needed. Expect standard power points and switches to operate on a single circuit, providing adequate power for your essential tools.
- External light — A weatherproof LED light positioned above the door will ensure visibility, helping you avoid fumbling around in the dark when entering or exiting the shed.
Designing a Comprehensive Powered Workshop Shed
If you frequently utilise power tools such as drop saws, bench grinders, and dust extractors, a more advanced wiring configuration becomes essential to cater to your needs:
- Multiple circuits — Having separate circuits for lighting, general power, and dedicated tool outlets will prevent flickering lights whenever a tool is activated, ensuring a smoother workflow and improved efficiency.
- Higher-rated power points — Providing 15-amp or 20-amp outlets is crucial for accommodating heavier tools that require more power to operate effectively and safely.
- Strategically placed additional power points — Install outlets at bench height rather than merely at skirting level, taking into account the actual locations of your workbenches to enhance efficiency and convenience.
- Dedicated lighting — Ensure brighter, more focused lighting is installed over work areas. Consider using LED high-bays for larger sheds to significantly improve visibility during intricate tasks.
For comprehensive guidance on configuring dedicated circuits for heavy tools, refer to our article, Powering a Rural Workshop — Dedicated Circuits for Heavy Tools and Equipment.
Establishing a Comprehensive Workshop With a Three-Phase Power Supply
If you plan to operate heavy-duty machinery, such as large compressors, lathes, MIG welders, or commercial-grade equipment, single-phase power may not suffice. In these circumstances, considering three-phase power is advisable for optimal performance.
Three-phase power offers more consistent and higher-capacity energy, allowing for efficient operation of multiple heavy-duty tools. Your electrician will need to:
- Arrange for a three-phase supply from your energy distributor, which may take several weeks on the Mid North Coast, so plan ahead.
- Install a three-phase sub-board in the shed, equipped with appropriate breakers and RCDs to ensure safety and compliance with regulations.
- Run heavier cabling — Note that three-phase cable runs are generally more costly, especially over long distances, and require careful planning.
- Install three-phase outlets — These industrial-grade sockets must be rated for the equipment being used to ensure safety and efficiency during operation.
If you are unsure whether three-phase power is necessary for your requirements, check out our article, Do I Need Three-Phase Power on My Property? This resource elaborates on when it is beneficial and when a well-designed single-phase setup will suffice. We also offer complete installations for three-phase switchboards should you choose that route.
Why Is Surge Protection Essential for Your Shed’s Safety?
Properties located on acreage in the Mid North Coast often experience severe lightning storms. A direct or nearby strike can cause extensive damage to everything housed within your shed, jeopardising tools, chargers, refrigerators, and all equipment that is connected to power.
Installing a high-quality surge protection device within the sub-board acts as a cost-effective form of insurance. This device absorbs voltage spikes before they reach your valuable equipment, safeguarding your investments. For sheds housing expensive tools or a workshop setup, surge protection is an absolute necessity to ensure the longevity of your equipment.
If your property utilises a generator for backup power, your electrician can also install a generator changeover switch, enabling the shed (and the house) to switch seamlessly to generator power safely during outages, maintaining your operations.
What Are the Regulations Surrounding Council Approval and Compliance in NSW?
There are several crucial regulations that you must be aware of when it comes to wiring your shed:
- All electrical work in NSW must be carried out by a licensed electrician. There are no exceptions to this rule. While you may dig the trench yourself to reduce labour costs, all electrical tasks—including cabling, connections, sub-board installation, and more—must be executed by a licensed contractor who will issue a Certificate of Compliance (CCEW) upon completion.
- Depth requirements for underground cables must comply with AS/NZS 3000 (the Wiring Rules). Your electrician will handle this aspect of the installation efficiently to ensure compliance and safety.
- If the shed is newly constructed, development approval may be required depending on your council and the dimensions of the shed. While the electrical work itself does not necessitate a separate permit, the overall building project might require it.
Hack-It Electrical Solutions operates under NSW Electrical Contractor Licence #230609C. Every job we complete comes with a compliance certificate to ensure safety and legality, giving you peace of mind.
Estimating Costs for Shed Wiring on Acreage: What Should You Expect?
Each shed presents unique challenges—distance from the house, the requirement for single-phase or three-phase power, the number of circuits needed, and soil conditions for trenching all contribute to the overall costs. Here’s a rough guide for the Mid North Coast:
- Basic shed wiring (light + a few power points, short cable run) — Starting from $2,500, depending on the specifics of your installation.
- Powered workshop shed with sub-board and multiple circuits — Starting from $4,500, reflecting the complexity of the setup.
- Full workshop setup with three-phase, dedicated circuits, and surge protection — Starting from $8,000+, taking into account the additional equipment and safety features.
Longer cable runs (50m+), rocky terrain necessitating a rock saw, or upgrades for three-phase supply will all increase the total cost. The most reliable method to receive an accurate estimate is to have your electrician conduct a site visit, evaluate the cable route, and understand the intended use of the shed to ensure proper planning.
For a customised quote tailored to your specific setup, please call us at 0402 079 803 or contact us here.
Addressing Your Frequently Asked Questions About Shed Wiring
Can I Wire My Shed Myself in NSW?
No, all electrical work in NSW must be performed by a licensed electrician. This includes running cables to the shed, installing the sub-board, power points, lighting, and all other related tasks. Attempting DIY electrical work is not only illegal but also poses significant dangers to both yourself and your property. Your electrician will provide a Certificate of Compliance upon completion of the work, ensuring it meets legal standards and safety protocols.
How Deep Should Underground Cable Be Buried?
According to the Australian Wiring Rules (AS/NZS 3000), underground cables within conduit must be buried at least 500mm deep under standard conditions. If vehicles are likely to drive over the cable run, the depth typically needs to be increased to 600mm or more to ensure safety. Your electrician will determine the appropriate depth for your specific property, ensuring compliance with safety regulations and preventing potential hazards.
Do I Need a Separate Meter for My Shed?
In most situations, no. The sub-board in your shed connects back to your main house switchboard and draws power from the same meter. A separate meter is only necessary if the shed is utilised as a distinct dwelling or commercial premises, which will require further discussions with your council and your energy distributor to ensure compliance with local regulations.
How Long Does It Take to Wire a Shed on Acreage?
A typical shed wiring project—comprising trenching, cable installation, sub-board setup, lights, and power points—generally takes one to two days to complete once the trench is prepared. If you are digging the trench yourself, your electrician can provide you with the specific route and depth prior to commencing work to streamline the process. Three-phase installations often take longer, as the supply connection must first be arranged with the distributor before installation can begin.
Can I Run Power From the Shed to Other Buildings?
Yes, it is feasible; however, each additional building will require its own appropriately rated cable run and may need its own sub-board based on electrical load. Your electrician can design the entire layout across multiple buildings, ensuring that the cabling and switchboard capacity are sufficient from the outset, rather than making subsequent additions that could lead to complications and safety issues.
Ensure Safe and Efficient Wiring for Your Shed
If you reside on acreage around Bellingen, Coffs Harbour, Sawtell, Boambee, or anywhere on the Mid North Coast, Hack-It Electrical Solutions is dedicated to ensuring your shed is wired correctly—whether it consists of a simple light-and-power setup or an extensive three-phase workshop tailored to your needs.
Contact us at 0402 079 803 or reach out via our website to schedule a site visit. We will assess your property, identify the most suitable cable route, and provide you with a clear, comprehensive quote tailored to your specific requirements.
Hack-It Electrical Solutions — NSW Electrical Contractor Licence #230609C — 5 stars, 114 reviews
The Article: Shed Wiring: Essential Tips for Your Electrician on Acreage first appeared on https://writebuff.com
The Article Shed Wiring Tips for Electricians Working on Acreage Was Found On https://limitsofstrategy.com
The Article Shed Wiring Tips for Electricians on Rural Properties found first on https://electroquench.com